Encrypting Files in FileMaker 13
If you are creating a database, especially for your business, then you probably have sensitive data that you need to store in it. It doesn’t matter if it’s client information, or patient data, or financial information, you won’t want outsiders accessing it. FileMaker already has tools that allow you to do that – user accounts, privilege sets, extended privileges, etc. FileMaker 13 gives you another tool for securing your data – it allows you to encrypt your database files using AES 256 bit encryption.
Setting this up isn’t terribly difficult, but you’ll need FileMaker 13 advanced in order to use the Developer tools. if you’ve ever used these tools to create a runtime solution, or rename a file, then the initial steps will probably look familiar.
Note: before you start, make sure that any files that you want to encrypt are closed; you can not encrypt files that are open.
1) In the tools menu, select developer utilities; this will open the Developer Utilities window
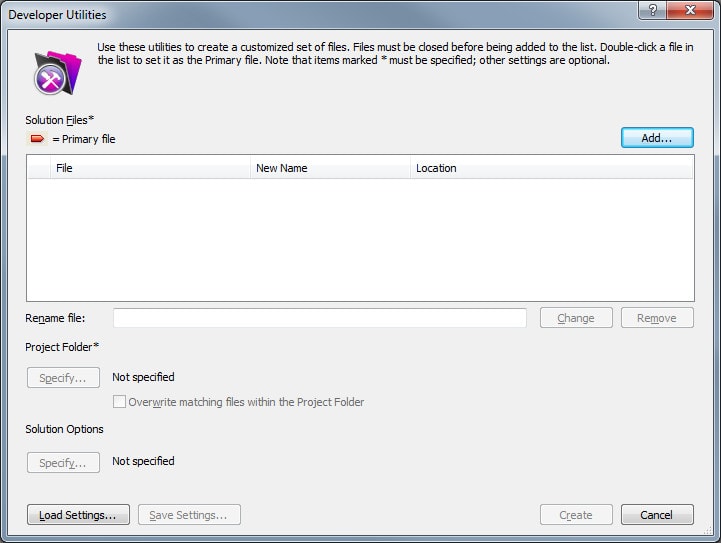
2) Click the Add button and select the file(s) that you want to encrypt.
3) Click the Specify… button in the Project Folder section. This will bring up a dialogue where you select the Project folder where the encrypted files will be saved.
4) Click the Specify… button underneath solution options. The dialogue that comes up has a number of options, but for now the one we are interested in is Enable Database Encryption. Click in the check box. The dialogue will change to list the steps needed to finish encrypting the files
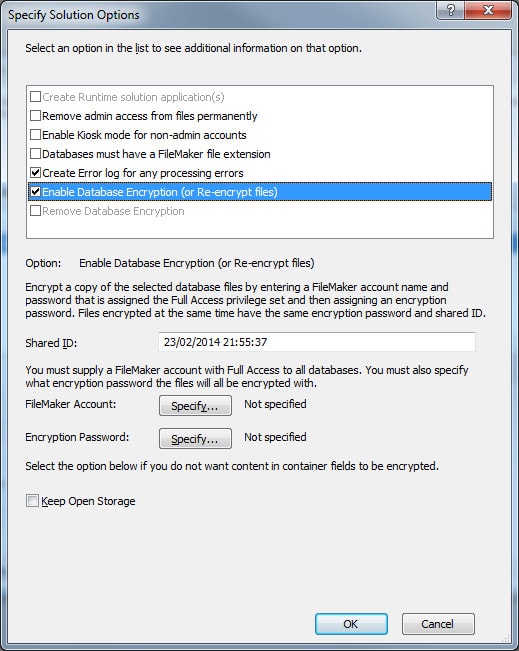
5) Click on the Specify… button next to FileMaker account. You will be prompted to enter in a user name and password; this user will need to have full access to all the files that you want to encrypt.
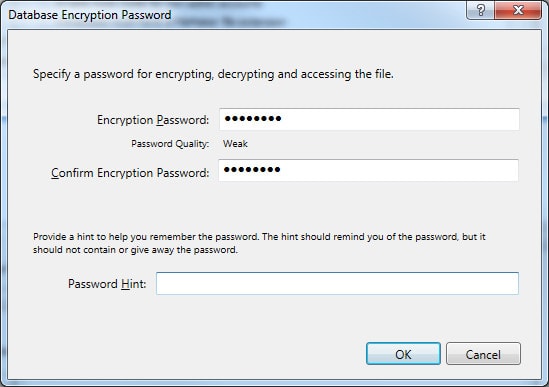
6) Click on the Specify… button next to Encryption password. This brings up a dialogue where you can enter a password and a password hint.

7) Click the create button. This will create an encrypted set of files in the project folder that you selected.
From now on, when you open the file(s). you will prompted to enter the encryption password. Note that if you upload the files to server, they will still be encrypted. When you open the files in the server Admin Console, you will have to enter the encryption password to open the file. Server does give you the option to remember the password, so that you don’t have to enter it every time you open the files on server.
FileMaker Advanced also comes with the option to remove encryption from a file. This is pretty similar to encrypting a file, simply select Remove Encryption from Database tools, then enter the encryption password and enter a FileMaker account with full access.
While you probably won’t use this on every file; it’s very handy for protecting files if you are sending files to a someone (via email, FTP, etc), or if you are carrying them around on a laptop.


Comments